Blog

  • Miso Ginger Beef Chuck Roast

    Miso Ginger Beef Chuck Roast

    Miso-chuck-roast

    If you’re looking for a simple, deeply nourishing dinner that feels both cozy and elevated, this miso ginger beef chuck roast is one of those recipes you’ll want to keep on repeat.

    It’s slow roasted until perfectly tender, then finished at a higher temperature for lightly crisped edges. The flavor is rich and savory with just the right balance of sweetness, acidity, and warmth from fresh ginger and garlic.

    It’s the kind of meal that feels special, but comes together with very little effort.

    What You’ll Love About Miso Ginger Beef Chuck Roast

    • Texture: Fall-apart tender beef with a simple slow roasting method. Finished with a lightly crispy, caramelized top.
    • Rich, savory flavor: With miso, tamari, garlic, and ginger
    • Versatile: Pair with your favorite roasted veggie and rice or on a sweet bun.
    • Easy to prepare: With minimal hands-on time.

    Ingredients You’ll Need To Make This Beef Chuck Roast

    Beef

    • Beef chuck roast: A well-marbled cut that becomes tender and flavorful when slow cooked

    Marinade

    • Tamari: adds depth and umami (use gluten-free if needed). Need soy free? Swap for coconut aminos
    • Miso: rich, savory flavor. Don’t have miso? You can swap for a tahini.
    • Honey: Balances the saltiness with a touch of sweetness
    • Rice wine vinegar: adds brightness
    • Garlic: Grated or finely minced
    • Fresh ginger: Grated ginger gives a vibrant and slightly spicy flavor
    • Red pepper flakes: optional heat

    For Serving

    • Green onions: fresh and crisp
    • Sesame seeds: light texture and nuttiness

    (See printable recipe card below for full list of ingredient amounts)

    How to Make Miso Ginger Beef Chuck Roast

    1. Preheat the Oven: Preheat your oven to 325°F.
    2. Make the Marinade: In a small bowl, whisk together the tamari, miso, honey, rice wine vinegar, garlic, ginger, and red pepper flakes until smooth.
    3. Coat the Beef: Cut the chuck roast into large pieces and toss well with the marinade until evenly coated.
    4. Slow Roast: Transfer the beef to a roasting dish and cover. Roast for about 3 hours, or until the beef is tender and pulls apart easily. If needed, return to the oven for an additional 30 minutes.
    5. Shred and Crisp: Once the beef is tender, shred it into large chunks and toss in the cooking juices. Increase the oven temperature to 450°F and return the beef to the oven uncovered for about 15 minutes, until the edges are lightly crisped.
    6. Garnish and Serve: Top with sliced green onions and sesame seeds and serve warm.

    Tips & Variations

    • Add 1 cup beef bone broth if your roasting dish isn’t tightly sealed
    • Adjust the spice level by increasing or reducing red pepper flakes
    • Use coconut aminos in place of tamari if preferred
    • This recipe reheats well and can be made ahead

    Why This Method for Chuck Roast Works

    Chuck roast is a naturally tough cut that becomes incredibly tender when cooked low and slow. As it roasts, the connective tissue breaks down, creating that signature fall-apart texture.

    The combination of miso and tamari builds deep, savory flavor, while honey and rice vinegar balance the richness. Finishing at a higher temperature adds a subtle crisp texture that contrasts beautifully with the tender meat.

    The post Miso Ginger Beef Chuck Roast appeared first on Elizabeth Rider – Modern Healthy Living.

  • Brunch on Sunday!

    Brunch on Sunday!

    A wife cooks lovely food on Sunday for her friends.

    Coming over to her house for brunch.

    She prepares all her amazing dishes such as pancakes.

    Waffles, French toast, avocado toast, and hash browns.

    For dessert there is a chocolate cake.

    Her husband says his wife is the best cook.

    All her friends love the brunch meals very much.

    Just couldn’t stop licking their fingers.

    Afterwards, the chocolate cake is served.

    Everyone enjoys everything and gives compliments!

  • Boat Shoe Outfits that Work for Real-Mom Life

    Boat Shoe Outfits that Work for Real-Mom Life

    Boat shoes are having a serious comeback right now, and I’ve been wearing mine on repeat since last fall. You’ve probably noticed them everywhere…on Instagram, at school pickup, at brunch. The good news is that the modern boat shoe is more versatile than it gets credit for. You don’t need a boat…or a yacht (although, if you have one of those, by all means, play the part). You just need a few solid boat shoe outfit combinations, and I’ll walk you through all seven outfit combos in this post.

    I wear the Sperry Slim Boat Shoes in tan in every look below. I also have a few other styles and price points linked in my Boat Shoe Outfit Collection on ShopMy here. The items in the collection can give you outfit inspo and help you find something that fits your personality for the perfect boat shoe outfit!

    What You Should Know About Boat Shoes Before You Style Them

    Below are a few things to note before we get into the boat shoe outfit ideas:

    The socks thing is real. Wearing boat shoes with socks…specifically white crew socks worn visibly above the ankle is very much on trend right now and it looks intentional, not sloppy. A white sock with a wide-leg jean cropped above the ankle is one of my favorite combinations in this post. Don’t overthink it. If you need more wide-leg jean inspo, you can read my post on how to style wide-leg jeans here.

    Fit matters more than you think. The Sperry Slim Boat Shoes have a slimmer profile than the classic boxy Sperry, which makes them much easier to wear with modern denim silhouettes that are on-trend right now. If you’ve tried women’s boat shoes before and didn’t love them, this slim version is worth another look.

    Tan leather is the most versatile color. It pairs with navy, white, blush, cream, black, and every shade of denim. It’s the starting point I’d recommend if you’re buying your first pair.

    They get better with wear. Leather boat shoes soften and break in over time. Give them a few wears before you make your final verdict.

    7 Boat Shoe Outfits That Work for Real-Mom Life

    Here are 7 outfit combinations that actually work, whether your style leans preppy or casual.

    1. The Classic Preppy Outfit: Jeans + Rugby Stripe Sweater or Polo

    A rugby stripe sweater or polo with wide-leg or barrel light wash jeans and boat shoes is the outfit that started this whole post. It’s a classic preppy style combination that looks polished without being overdone. You can swap jeans for denim shorts and a long sleeve for a short sleeve polo for warmer weather and the look will translate perfectly. Add a navy baseball cap to make it the perfect casual boat shoe outfit.

    The key with wide leg jeans and boat shoes is proportion. A cropped or fitted top keeps the silhouette balanced. A tan leather tote or crossbody bag finishes the look perfectly.

    SHOP THE LOOK: Stripe Rugby Polo  |  Light Wash Barrel Jeans  |  Sperry Slim Boat Shoes  |  Navy Baseball Cap  |  Leather Tote

    2. The Softer Option: Light Wash Jeans + Pink Sweater

    A soft pink sweater with light wash jeans and tan boat shoes is a combination I didn’t expect to love as much as I do. The warm tan leather against blush pink works so well together. Pair it with white crew socks worn visibly over the ankle and it looks completely intentional…because it is.

    On warmer days, swap the chunky knit for a short-sleeve sweater or lightweight top in the same soft color palette. The boat shoe looks perfect with both.

    SHOP THE LOOK: Pink Sweater  |  Short-Sleeve Sweater  |  Light Wash Jeans  |  Sperry Slim Boat Shoes  | Crossbody Bag

    3. The Simple One: White Tee + Jeans

    Grab your favorite white tee, favorite jeans, and boat shoes. It’s simple, it works, and the accessory is what gives it shape. A baseball cap reads casual and sporty. A lightweight scarf or sweater tied loosely at the neck turns the same outfit into something that looks more considered. Either direction, this is a combination worth keeping in your back pocket for casual outfits when you want to look put together without spending a lot of time getting dressed. If you want more ideas for cute spring outfits to carry you from spring to summer check out my blog post here.

    One styling note: cuff your straight-leg jeans once at the ankle to show off the shoe. It changes the whole proportion.

    SHOP THE LOOK: White Tee  |  Straight-Leg Jeans  |  Sperry Slim Boat Shoes  |  Baseball Cap

    4. The Polished One: Pleated Shorts + Polo + Jacket

    This is the outfit that makes you look like you have it together, even on the days you absolutely do not. Pleated shorts are inherently more put-together than regular shorts, a fitted sleeveless top or polo adds structure underneath, and an open jacket ties it all into something that reads dressed-up casual.

    The boat shoe is perfect here because it bridges preppy style and practical. It’s more polished than a sneaker, more comfortable than a sandal, and it fits the classic aesthetic of this outfit without trying too hard. This is also a great formula for warm-weather events where you want to look more intentional than just jeans. If you’re figuring out what to wear as a baby shower guest this spring, this kind of outfit translates well.

    SHOP THE LOOK: Pleated Shorts  |  Sleeveless Polo  |  Utility Jacket  |  Sperry Slim Boat Shoes  |  Leather Tote Bag |  White Baseball Hat

    5. The Weekend Formula: Jean Shorts + Button-Up Shirt

    Jean shorts (these Abercrombie ones are my all-time favorite mom approved shorts) and a button-up were practically designed for boat shoes. A classic white button-up looks crisp and clean; a stripe version adds personality. Roll the sleeves, leave it untucked or tied loosely at the waist, and the outfit is done. This is the kind of look that works for a farmer’s market, a weekend lunch, or a long errand day, and you still feel like you actually thought about getting dressed.

    Worth noting: All of these outfit ideas work great with white sneakers (more on my favorite white sneakers here). When getting dressed, if you’re deciding between the two, boat shoes are the perfect upgrade if you’re looking for something a little more polished vs. casual. Boat shoes are like the classy older sister to white sneakers…just slightly more distinctive. 

    SHOP THE LOOK: Jean Shorts  |  White Button-Up  |  Stripe Button-Up  |  Sperry Slim Boat Shoes

    6. The Easy Layer: Khaki Trench + White Tee + Jeans

    A khaki or camel trench coat over a simple white tee and straight-leg jeans is a casual spring outfit formula that always looks good. Add boat shoes and the whole thing leans into a classic, clean aesthetic that feels thought-through without being overdressed. This combination works especially well for spring mornings that start cool and warm up fast. The trench layer comes off easily and the outfit underneath holds up on its own.

    SHOP THE LOOK: Khaki Trench Coat  |  White Tee  |  Straight-Leg Jeans  |  Sperry Slim Boat Shoes

    7. The Spring Go-To: Linen + Stripe Tee or Sweater

    Linen and boat shoes just make sense together. For this outfit whether you choose linen pants, linen shorts or even a linen skirt, you can’t go wrong here. The natural fabric and tan leather are in the same aesthetic neighborhood, and the combination is genuinely comfortable for spring and early summer. A stripe tee keeps it relaxed and classic. A stripe or solid sweater works when it’s cooler. The boat shoe gives the whole look a little more structure than a sandal would, which is sometimes exactly what a loose linen silhouette needs.

    This is also a great formula for building out your casual spring outfit wardrobe with a shoe that works across multiple looks.

    SHOP THE LOOK: Linen Pants |  Linen Shorts  |  Stripe Tee  |  Stripe Boat Neck  | Lightweight Sweater  | Sperry Slim Boat Shoes  

    The Sperry Boat Shoes in Every Outfit

    Every look above is styled with the Sperry Slim Boat Shoes in tan, which are currently on sale! The slim profile is what makes them work with so many modern silhouettes. The slim profile updates the classic boat shoe silhouette just enough to work with today’s denim. They’re made with leather uppers that soften with wear and a non-marking rubber sole, so they’re as practical as they are cute. You could pair any style of boat shoes with these outfits and have a winning formula no matter what you’re preferred look is.

    What’s your go-to shoe for spring? Are you already on the boat shoe train or did this post convince you to try them?

    Shop The Post + Outfit Inspo

    The post Boat Shoe Outfits that Work for Real-Mom Life appeared first on TeriLyn Adams.

  • Easy Skirt Steak with Reverse Marinade

    Easy Skirt Steak with Reverse Marinade

    If you’ve ever struggled with tough, overcooked steak or marinades that burn in the pan, this method is about to change everything.

    This easy skirt steak recipe uses a simple but game-changing technique: a reverse marinade.

    Instead of marinating before cooking (which often leads to burning, uneven searing, or rubbery texture), you’ll cook the steak first—then let it soak up a bold, flavorful marinade while it rests.

    The result? Perfectly seared, juicy steak with incredible flavor in every bite. The best part is that its incredibly simple.

    What You’ll Love About Marinated Skirt Steak

    • Foolproof method: No more burnt marinades or overcooked steak
    • Ultra juicy texture: Resting + reverse marinade = tender results
    • Quick and easy: Ready in about 20 minutes
    • Dietary friendly: High-protein, naturally gluten-free (use tamarind or GF soy)
    • Kitchen staples: Big flavor, minimal ingredients

    Why Reverse Marinade Method Works

    Traditional marinades often contain sugar and acid, which can burn in a hot pan and prevent a proper sear.

    By adding the marinade after cooking, you get the best of both:

    • A well-developed crust
    • A fresh, vibrant flavor
    • A more tender final texture

    It’s a small shift that makes a noticeable difference.

    Ingredients You’ll Need for Marinated Skirt Steak

    Skirt Steak

    • Skirt steak: thin-cut, cooks quickly and stays flavorful
    • Salt: enhances flavor and helps tenderize the meat
    • Avocado oil: Ideal for high-heat searing

    Reverse Marinade

    • Extra virgin olive oil: Adds richness and balance
    • Tamarind or soy sauce: Umami base preferred, but you can swap out for coconut aminos if needed
    • Fresh lime juice: Bright acidity
    • Honey: A touch of natural sweetness
    • Dried herbs or fresh parsley: Optional, but delicious finish

    How to Make Skirt Steak with Reversed Marinade

    1. Bring the Steak to Room Temperature: Remove the steak from the fridge about 1 hour before cooking and season with salt (about ½ teaspoon per pound). Letting the steak rest at room temperature helps it cook more evenly and improves the final texture.
    2. Prepare the Marinade: In a small bowl, whisk together the garlic, olive oil, tamarind or soy sauce, lime juice, honey, and herbs. Set aside.
    3. Sear the Steak: Heat a skillet (a cast iron pan works especially well) over medium-high heat. Lightly coat the steak with avocado oil and add a small amount to the pan. Sear for 3–4 minutes per side, until a golden crust forms and the center remains slightly pink.
    4. Reverse Marinate and Rest: Transfer the steak to a plate and immediately pour the marinade over the top. Let it rest for about 10 minutes. As the steak rests, it absorbs the marinade, adding flavor without interfering with the sear.
    5. Slice and Serve: Slice the steak thinly against the grain and spoon any remaining marinade over the top. Finish with fresh herbs if you’d like, and serve warm.

    Tips and Variations

    • Cutting technique: Slice against the grain for the most tender texture.
    • No lime? Swap lime juice with red wine vinegar for a different flavor profile.
    • Soy-free: Use coconut aminos for a soy-free option.
    • Spice it up: Add red pepper flakes for a little heat.
    • Summer grilling: Grill instead of pan-searing when the weather allows. Perfect for outdoor entertaining.

    The post Easy Skirt Steak with Reverse Marinade appeared first on Elizabeth Rider – Modern Healthy Living.

  • Does Avocado Oil Go Bad? Everything You Need To Know

    You spot that bottle of avocado oil in the back of the cabinet and realize it has been sitting there for quite a while. The question that follows: does avocado oil go bad?

    The short answer: Yes, avocado oil does go bad. Like all cooking oils, it goes rancid over time through a process called oxidation. The good news is that avocado oil is one of the more stable cooking oils available, and with proper storage it can stay fresh for well over a year.

    For a full overview of how cooking oils and pantry staples compare on shelf life, visit our Complete Food Storage Guide.

    Key Takeaways

    • Avocado oil does go bad, primarily through rancidification from exposure to air, heat, and light.
    • Shelf life: 1 to 2 years unopened; 6 to 8 months opened in the pantry; up to 12 months refrigerated for refined, up to 8 months refrigerated for unrefined.
    • Rancid avocado oil smells like Play-Doh, crayons, or old wax. Trust your nose above all else.
    • Refined avocado oil lasts slightly longer than unrefined (extra virgin) once opened.
    • Warning: research from UC Davis found that most commercial avocado oils are already rancid or adulterated before you even open them. Knowing what to look for when buying matters.

    How Long Does Avocado Oil Last?

    Avocado oil is primarily composed of monounsaturated fats (roughly 70%), which are significantly more stable than the polyunsaturated fats found in sesame, flaxseed, or walnut oils. This is one of the reasons it sits comfortably alongside olive oil in terms of shelf stability among culinary oils.

    Type Pantry (Unopened) Pantry (Opened) Refrigerator (Opened)
    Refined Avocado Oil 1 to 2 years 6 to 8 months Up to 12 months
    Unrefined / Extra Virgin Avocado Oil 6 to 12 months 4 to 6 months Up to 8 months

    These are quality estimates based on proper storage. Always check for spoilage signs before using, regardless of date.

    The “best by” date on your bottle is a manufacturer quality estimate, not a safety cutoff set by the FDA. A properly stored bottle that smells and tastes fine may be good past that date. However, there is a significant caveat specific to avocado oil that is worth knowing.

    The Avocado Oil Adulteration Problem You Need to Know About

    Your Bottle May Already Be Bad Before You Open It

    This is the gap that most avocado oil storage guides skip entirely. Researchers at the University of California, Davis published two major studies on commercial avocado oil quality. The first, in 2020, tested 22 samples and found that 82% were either already rancid before their expiration date or adulterated with cheaper oils like soybean, sunflower, or safflower oil. In three cases, bottles labeled “pure” or “extra virgin” contained nearly 100% soybean oil.

    A follow-up study in 2023 found similar problems, with nearly 70% of private label (store brand) avocado oils failing quality or purity standards.

    The reason this happens comes down to the absence of enforceable standards. Unlike olive oil, which has well-established grades and regulations, avocado oil has historically had no FDA standards of identity to prevent mislabeling. This created an environment where fraud was both easy and low-risk. In late 2024, the international food standards body Codex Alimentarius adopted new purity guidelines for avocado oil, which is a meaningful step forward, though enforcement at the retail level is still evolving.

    What this means practically: do not assume a bottle is good just because it is within its best-by date. Always smell and taste before using, even a freshly opened bottle.

    How to Tell If You Are Buying Quality Avocado Oil

    The UC Davis research identified a few visual indicators of authenticity that are useful when shopping:

    Virgin or extra virgin avocado oil should be vibrant green. The green color comes from chlorophyll in the avocado fruit. If a bottle labeled “extra virgin” is pale yellow or nearly clear, that is a sign the oil may have been refined or adulterated.

    Refined avocado oil should be pale yellow to light golden and nearly clear. This is normal for refined oil since refining removes the chlorophyll.

    Price is a rough signal. The UC Davis researchers noted that extremely low-priced oils were more likely to be adulterated, though high price does not guarantee quality. Brands that passed both the 2020 and subsequent purity studies include Chosen Foods and Marianne’s Avocado Oil, both refined avocado oils from Mexico.

    Dark glass bottles offer better protection from light than clear plastic. If you have the choice, opt for a brand that uses dark or opaque packaging.

    Signs That Avocado Oil Has Gone Bad

    When to Throw It Out

    Smell: The most reliable test. Fresh refined avocado oil has a mild, neutral, slightly buttery smell. Fresh extra virgin avocado oil smells grassy, buttery, and faintly of avocado. Rancid avocado oil smells like Play-Doh, crayons, wax, or paint thinner. Any of those odors means discard immediately.

    Taste: Fresh avocado oil has a mild, clean, slightly buttery taste. Rancid oil tastes bitter, sharp, or soapy. If the smell test was borderline, a tiny taste on a clean spoon will confirm it.

    Color: Refined avocado oil that has turned noticeably dark or murky at room temperature is worth investigating. Extra virgin oil that has lost its green color entirely and turned pale may have degraded. Color changes alone are not definitive, but they prompt a closer smell and taste check.

    What is NOT a sign of spoilage: Avocado oil may turn cloudy or partially solidify when refrigerated or in cool temperatures. This is caused by natural waxes in the oil hardening in the cold. It is completely normal, has no effect on quality, and reverses fully at room temperature. Similarly, slight sediment in unrefined avocado oil is normal and not a sign of spoilage.

    How to Store Avocado Oil Properly

    Storage Best Practices

    Cool, dark pantry for everyday use. A kitchen cabinet away from the stove and out of direct sunlight is the right spot. Avocado oil is stable enough at room temperature that most people do not need to refrigerate it, and Chosen Foods, one of the only brands to pass the UC Davis purity testing, confirms on their official FAQ that their avocado oil does not require refrigeration.

    Refrigerate for longer storage. If you have a large bottle you will not finish quickly, or you have unrefined avocado oil, refrigeration extends shelf life noticeably. The oil will thicken or solidify in the fridge but returns to normal at room temperature.

    Always keep the cap tight. Oxygen is the primary driver of rancidity. Seal the bottle firmly after every use.

    Never store near the stove. Heat and light dramatically accelerate oxidation. The shelf or cabinet above the range is one of the worst spots in the kitchen for any oil.

    Buy appropriately sized bottles. If you do not cook with avocado oil daily, a smaller bottle that you finish within a few months is a better choice than a large one that sits open for a year.

    Label the opening date. Write the date you first opened the bottle on the label. This eliminates guesswork when you reach for it months later.

    Avocado Oil Recipes Worth Trying

    If your avocado oil is fresh and you are ready to use it, these Better Living recipes are a great starting point. Avocado oil’s high smoke point and neutral flavor make it excellent for high-heat cooking and everyday sauteing:

    Frequently Asked Questions

    Can I use avocado oil that smells slightly off?

    No. Even slightly rancid avocado oil will negatively affect the flavor of your food and introduces oxidation byproducts that are not beneficial to your health. The smell test is your clearest signal. If it smells anything like crayons, wax, or Play-Doh, replace it. A new bottle is always cheaper than a ruined meal.

    My avocado oil is cloudy or has sediment. Is it bad?

    Cloudiness alone is not a sign of spoilage. Cold temperatures cause natural waxes in the oil to solidify, creating cloudiness. Sediment in unrefined or extra virgin avocado oil is also normal. It consists of natural plant particles from the cold-pressing process. Bring the oil to room temperature and check the smell. If it smells fresh and clean, it is fine to use.

    Is avocado oil more stable than olive oil?

    They are comparable. Both are primarily monounsaturated fats and have similar stability at room temperature. Avocado oil has a significantly higher smoke point (up to around 520 degrees F for refined) compared to olive oil, making it better suited for high-heat cooking. For storage purposes, treat them similarly: cool, dark pantry for everyday use, refrigerate for longer-term storage.

    How do I know if my avocado oil is actually avocado oil?

    This is a legitimate concern given the UC Davis research. Virgin or extra virgin avocado oil should be distinctly green. Refined avocado oil should be pale yellow. An oil labeled extra virgin that is pale or yellowish is a flag. Brands confirmed as pure by independent testing include Chosen Foods and Marianne’s Avocado Oil. Very cheap avocado oil from unknown sources is more likely to be adulterated.

    Can you freeze avocado oil?

    Yes. Avocado oil can be frozen for very long-term storage, though it is rarely necessary given its already reasonable shelf life. Frozen oil will need to thaw at room temperature before use. Freezing does not harm quality, though repeated freeze-thaw cycles over a long period may gradually affect flavor.

    Further Reading

    The post Does Avocado Oil Go Bad? Everything You Need To Know appeared first on Better Living.

  • Does Avocado Oil Need to Be Refrigerated?

    You just finished cooking and now you are standing there with an open bottle of avocado oil wondering where it belongs. Does avocado oil need to be refrigerated?

    The short answer: No, avocado oil does not need to be refrigerated before or after opening. A cool, dark pantry is the standard storage recommendation. Refrigeration is optional but does extend shelf life, especially if you have a large bottle you will not finish quickly.

    For a full overview of how cooking oils and pantry staples compare on storage needs, visit our Complete Food Storage Guide.

    Key Takeaways

    • No refrigeration required for avocado oil, before or after opening.
    • Best storage: a cool, dark pantry or cabinet, away from heat and direct sunlight.
    • Refrigeration is a smart option if you have a large bottle, unrefined oil, or a warm kitchen.
    • Cloudy or solid refrigerated oil is normal and fully reversible at room temperature.
    • Shelf life opened: 6 to 8 months in the pantry; up to 12 months refrigerated.

    Why Avocado Oil Does Not Require Refrigeration

    Avocado oil’s stability comes from its fat profile. It is roughly 70% monounsaturated fats (primarily oleic acid), the same type found in olive oil. Monounsaturated fats are far more resistant to oxidation than the polyunsaturated fats found in more fragile oils like sesame, flaxseed, or walnut oil. This stability means avocado oil does not need the cold environment of a refrigerator to stay fresh over normal use periods.

    Chosen Foods, one of the only brands confirmed as pure and unadulterated in independent UC Davis research, confirms on their official FAQ that their avocado oil does not need refrigeration. A cool, dark pantry is all it needs for everyday use.

    When Refrigerating Avocado Oil Makes Sense

    While refrigeration is not required, there are situations where it makes good practical sense:

    Large bottles you will not finish quickly. Avocado oil is often sold in generous sizes. If you are not a heavy user and you know a bottle will sit open for many months, the fridge helps extend quality.

    Unrefined or extra virgin avocado oil. Unrefined oil retains more natural compounds including chlorophyll and delicate antioxidants that degrade faster than the refined variety. Refrigerating unrefined avocado oil after opening is a sensible precaution.

    Hot or humid kitchens. If your kitchen regularly stays warm, the accelerated oxidation from heat makes refrigeration a worthwhile choice even for everyday use.

    You cook with it infrequently. An opened bottle that gets used a few times a month is exposed to air repeatedly over a longer period. Refrigeration helps compensate.

    What Happens If You Refrigerate Avocado Oil

    Cloudiness and Solidifying Are Normal

    Avocado oil may turn cloudy, thicken, or partially solidify when refrigerated. This is caused by natural waxes in the oil hardening at cold temperatures. It is not spoilage and it has no effect on flavor or nutritional quality. Simply leave the bottle at room temperature for 15 to 20 minutes before using and it will return to its normal liquid state. This is one of the most commonly misunderstood things about refrigerating avocado oil. The cloudiness alarms people, but it is entirely harmless and fully reversible.

    Refined vs. Unrefined Avocado Oil: Does Storage Differ?

    Yes, slightly. Understanding which type you have helps you store it correctly.

    Refined avocado oil is the most common type on supermarket shelves. It is pale yellow, nearly odorless, and has a very high smoke point of around 500 to 520 degrees F, making it excellent for high-heat cooking. Refining strips out some natural compounds that can degrade over time, making refined avocado oil the more stable of the two. A cool pantry is fine for everyday storage, and it holds quality well for 6 to 8 months after opening.

    Unrefined (extra virgin) avocado oil is cold-pressed with minimal processing. It retains its natural green color from chlorophyll, has a grassy, buttery, faintly avocado-like flavor, and carries more of the oil’s natural antioxidants. However, those same natural compounds make it somewhat more sensitive to heat and light. Refrigerating unrefined avocado oil after opening is a better practice than pantry storage, especially if you use it slowly.

    How to Store Avocado Oil for Maximum Freshness

    Storage Best Practices

    Choose a cool, dark cabinet. Away from the stove, oven, and any windows. Consistent, moderate temperature is ideal. The cabinet above the range is one of the worst spots in the kitchen for any oil.

    Always keep the cap tight. Oxygen accelerates rancidity. Seal the bottle firmly after every single use.

    Use a clean, dry utensil or pour directly. Never introduce water or food particles into the bottle.

    Label the bottle with the opening date. A quick mark with a permanent marker tells you exactly how long it has been open when you reach for it weeks later.

    Consider bottle size. If you use avocado oil occasionally, a smaller bottle that you finish in a couple of months will always taste better than a large one sitting open for many months.

    For unrefined or extra virgin avocado oil: refrigerate after opening. Its natural compounds are more vulnerable to oxidation and the fridge extends its quality meaningfully.

    A Word on Buying Quality Avocado Oil

    Refrigerating your oil correctly matters less if the oil was already compromised before you bought it. Two major studies from the University of California, Davis found that the majority of commercial avocado oils in the US were either rancid before their expiration date or mixed with cheaper oils like soybean or sunflower oil. This is especially common with very low-priced store brands.

    Always do a smell and taste check on a freshly opened bottle. Fresh refined avocado oil should smell mild and slightly buttery. Fresh extra virgin oil should smell grassy and green. Anything resembling crayons, Play-Doh, or paint thinner means the bottle is already rancid. See our companion post for the full spoilage guide: Does Avocado Oil Go Bad?

    Ready to Cook? Try These Recipes

    Avocado oil’s high smoke point and clean flavor make it one of the best oils for high-heat cooking. These Better Living recipes are excellent uses for it:

    Frequently Asked Questions

    How long does avocado oil last once opened without refrigeration?

    In a cool, dark pantry with the cap tightly sealed, refined avocado oil stays at best quality for 6 to 8 months after opening. Unrefined oil is best used within 4 to 6 months without refrigeration. Refrigerating either type extends these windows meaningfully. Always do the smell test before using regardless of how long it has been open.

    My refrigerated avocado oil has turned solid. Is it still good?

    Yes. Avocado oil solidifies or becomes very thick when refrigerated, especially at temperatures below around 40 degrees F. This is normal and does not indicate spoilage. Leave the bottle at room temperature for 15 to 20 minutes and it will return to a liquid state. Check the smell once it warms up. If it smells clean and mild, it is perfectly fine to use.

    Should I refrigerate avocado oil spray?

    No. Avocado oil cooking sprays are typically formulated with stabilizers and propellants that keep them shelf-stable at room temperature. Store them in a cool, dark pantry and use within the best-by date. Refrigerating a spray can is not necessary and may affect the spray mechanism.

    Does avocado oil need refrigeration after cooking with it?

    The oil remaining in your storage bottle does not need refrigeration after you cook with some of it, as long as you seal the bottle tightly. Oil that has been used for cooking and has food particles in it should not be returned to the storage bottle at all. Discard used cooking oil separately and keep your storage bottle clean.

    Further Reading

    The post Does Avocado Oil Need to Be Refrigerated? appeared first on Better Living.

  • Does Sesame Oil Need to Be Refrigerated?

    You just finished cooking and now you are holding that bottle of sesame oil wondering where it belongs. Does sesame oil need to be refrigerated?

    The short answer: It depends on which type you have. Toasted (dark) sesame oil should be refrigerated after opening. Plain (light) sesame oil is more stable and can live in a cool, dark pantry, though refrigeration extends its life further. The type you have makes a real difference.

    For a full overview of cooking oil and pantry staple storage, visit our Complete Food Storage Guide.

    Key Takeaways

    • Toasted sesame oil: refrigerate after opening. Its intense flavor degrades quickly at room temperature.
    • Plain sesame oil: pantry is fine, but refrigeration extends quality especially in warm kitchens.
    • Unopened sesame oil of either type stores well in a cool, dark pantry for 1 to 2 years.
    • Cloudy refrigerated oil is normal and not a sign of spoilage. It clears up at room temperature.
    • The biggest enemies of sesame oil are heat, light, and air exposure after opening.

    The Two Types of Sesame Oil and Why Storage Differs

    Understanding which sesame oil you have is the key to storing it correctly. The two types behave very differently.

    Plain sesame oil (also called light or untoasted sesame oil) is pressed from raw seeds and has a neutral, mild flavor with a high smoke point. It functions like a general cooking oil. Its fat composition is more stable, meaning it holds up reasonably well at room temperature in a cool, dark pantry.

    Toasted sesame oil (also called dark sesame oil) is pressed from seeds that have been roasted before pressing. That roasting process is what gives it the deep amber color and bold, nutty aroma that makes it one of the most distinctive ingredients in Asian cooking. It is almost exclusively used as a finishing oil, added at the end of cooking or drizzled over a completed dish. The same compounds that create that incredible flavor make it significantly more vulnerable to oxidation. Toasted sesame oil left at room temperature for months will lose its flavor and eventually go rancid, consistent with research on sesame oil oxidation and storage stability published by the National Institutes of Health.

    Does Toasted Sesame Oil Need to Be Refrigerated?

    Yes. Once opened, toasted sesame oil should go in the refrigerator. Its polyunsaturated fat content and the oxidation-prone compounds created during roasting mean it degrades noticeably faster than plain sesame oil at room temperature.

    Refrigeration is not strictly required for food safety. Toasted sesame oil will not grow harmful bacteria the way a dairy product would. The concern is purely quality. An opened bottle left on a warm kitchen counter or near the stove can begin losing its signature flavor within weeks, and will likely be rancid within 4 to 6 months. The same bottle kept in the refrigerator retains peak quality for 6 to 9 months.

    If you use toasted sesame oil quickly (finishing a bottle within a month or two), pantry storage in a cool, dark cabinet is perfectly acceptable. The refrigerator becomes essential the longer the bottle sits open.

    Does Plain Sesame Oil Need to Be Refrigerated?

    Not strictly, but it helps. Plain sesame oil is more forgiving than toasted. Its milder fat profile is more resistant to oxidation, and it lacks the volatile flavor compounds that degrade so quickly in toasted oil.

    A cool, dark pantry away from the stove and direct sunlight is a perfectly reasonable storage spot for plain sesame oil, and it will stay at good quality for 6 to 9 months after opening this way. Refrigerating it extends that to close to a year. In a warm kitchen or during summer months, refrigeration becomes a better default.

    What Happens If You Do Not Refrigerate Sesame Oil?

    Room Temperature vs. Refrigerated

    For plain sesame oil, room temperature storage in a cool pantry works fine if you use it within 6 to 9 months. For toasted sesame oil, leaving it at room temperature after opening means the nutty aroma and flavor begin fading within weeks. Within a few months you may notice the oil smells flat or slightly stale. Within 4 to 6 months it may smell rancid entirely. Rancid sesame oil smells like paint thinner or old crayons and will ruin whatever you drizzle it on. The refrigerator is the easiest way to avoid this entirely.

    Will Refrigerating Sesame Oil Affect Its Flavor?

    This is one of the most common concerns, and the answer is no. Cold temperatures slow oxidation without altering the flavor compounds in sesame oil. When you bring refrigerated sesame oil back to room temperature before using, it tastes exactly as it should.

    The one visual change refrigeration causes is cloudiness. Cold sesame oil may turn cloudy or slightly thick, which can be alarming if you have not seen it before. This is caused by natural waxes in the oil solidifying at cold temperatures. It is not spoilage, it does not affect the flavor, and it reverses completely as the oil warms up. Leave the bottle on the counter for 10 to 15 minutes before using and it will return to its normal color and consistency.

    How to Store Sesame Oil Properly

    Storage Best Practices

    Toasted sesame oil: Refrigerate after opening. Keep the cap tightly sealed between uses. For small amounts used as a finishing oil, a back shelf of the fridge (where temperatures are most consistent) is ideal.

    Plain sesame oil: A cool, dark pantry or kitchen cabinet away from the stove and any heat source. Refrigerate if your kitchen runs warm or if you do not use it frequently.

    Unopened bottles (either type): Cool, dark pantry. No refrigeration needed until the seal is broken.

    Keep the cap clean and tight. Wiping the rim after every use prevents residue buildup, which can harbor bacteria and introduce off-flavors.

    Store away from heat sources. The cabinet above the stove or beside the oven are the worst spots in the kitchen for any oil. Heat accelerates oxidation significantly.

    Buy the right bottle size. Because toasted sesame oil is used in small amounts, a large bottle can sit open for a long time. Buying a smaller bottle that you finish within a couple of months is one of the most practical ways to always have fresh oil on hand. The cost difference is minor compared to pouring out half a bottle of rancid oil.

    Ready to Use It? Try These Recipes

    If your sesame oil is fresh and you are ready to put it to work, these Better Living recipes are a great starting point:

    Frequently Asked Questions

    My sesame oil has been in the pantry for a year since I opened it. Is it still good?

    For plain sesame oil, a year at room temperature in a cool pantry is at the outer edge of expected quality. Check the smell carefully. If it smells nutty and mild, it is likely still fine. If it smells at all like paint, crayons, or anything chemical, it has gone rancid and should be replaced. For toasted sesame oil, a year at room temperature almost certainly means it has gone rancid. Do the smell test and trust the result.

    Can I keep sesame oil next to the stove for easy access?

    This is a very common habit and one of the fastest ways to ruin sesame oil. Heat from cooking, even ambient warmth from nearby burners, dramatically accelerates oxidation. Keep sesame oil in a cabinet or the fridge, and just bring out what you need for a specific recipe. A small pour into a separate bowl before cooking is all you need for most dishes.

    Should I warm refrigerated sesame oil before using it?

    Yes, briefly. Sesame oil thickens in the refrigerator and may pour slowly or appear cloudy when cold. Leave the bottle at room temperature for 10 to 15 minutes before using it, or place it in a bowl of warm water for a couple of minutes. Once it returns to room temperature, the cloudiness clears and the oil pours normally. This step takes almost no effort and preserves the quality of your oil significantly.

    Does refrigeration work differently for sesame oil than for olive oil?

    Somewhat. Olive oil is primarily monounsaturated fat and is relatively stable at room temperature, making refrigeration optional for most users. Sesame oil, particularly the toasted variety, is higher in polyunsaturated fats which are more reactive. This is why refrigeration is more strongly recommended for toasted sesame oil than it is for olive oil. Both can be refrigerated without any quality loss. The main inconvenience is the temporary thickening and cloudiness that reverses at room temperature.

    Further Reading

    The post Does Sesame Oil Need to Be Refrigerated? appeared first on Better Living.

  • Does Sesame Oil Go Bad? Everything You Need To Know

    You reach for that bottle of sesame oil and realize it has been sitting in the cabinet for months. The question hits: does sesame oil go bad?

    The short answer: Yes, sesame oil does go bad. Unlike ultra-stable oils such as coconut oil, sesame oil is primarily made up of unsaturated fats that are prone to oxidation over time. When that happens, the oil goes rancid and can ruin a dish entirely. The good news is that proper storage makes a significant difference.

    For a full overview of how cooking oils and other pantry staples compare on shelf life, visit our Complete Food Storage Guide.

    Key Takeaways

    • Sesame oil does go bad, primarily through rancidification, a process where fats break down from exposure to air, heat, and light.
    • Two very different types: plain (light) sesame oil lasts much longer than toasted (dark) sesame oil.
    • Toasted sesame oil should be refrigerated after opening. Plain sesame oil is more forgiving but benefits from refrigeration too.
    • Shelf life: unopened sesame oil lasts 1 to 2 years. Opened toasted oil is best within 6 months; opened plain oil within 9 to 12 months.
    • Your nose is your best tool. Rancid sesame oil smells like paint thinner, old crayons, or nail polish remover.

    Plain vs. Toasted Sesame Oil: Why the Difference Matters

    Before getting into shelf life, it helps to know which type you have, because they behave very differently in storage.

    Plain (light) sesame oil is pressed from raw, untoasted sesame seeds. It has a very mild, subtle flavor and a higher smoke point, making it useful as a general cooking oil for sauteing and stir-frying. It is pale yellow in color and relatively stable compared to its toasted counterpart.

    Toasted (dark) sesame oil is pressed from seeds that have been roasted before pressing. That roasting process gives it the deep amber color, intense nutty aroma, and bold flavor that makes it a favorite finishing oil in Asian cooking. It is almost never used for high-heat cooking. A small drizzle over a finished dish or into a sauce is enough. The same toasting process that creates that incredible flavor also makes it significantly more susceptible to oxidation and rancidity.

    This is the key point that most people miss: toasted sesame oil needs more careful storage and has a shorter shelf life than plain sesame oil. If you have a dark, intensely fragrant bottle, treat it like a perishable ingredient.

    How Long Does Sesame Oil Last?

    Type Pantry (Unopened) Pantry (Opened) Refrigerator (Opened)
    Plain / Light Sesame Oil 1 to 2 years 6 to 9 months Up to 1 year
    Toasted / Dark Sesame Oil 1 to 2 years 4 to 6 months 6 to 9 months

    These are quality estimates. Storage conditions, bottle size, and how often the bottle is opened all affect actual shelf life. Always check for spoilage signs before using.

    The “best by” date on your bottle is a manufacturer quality estimate, not a safety expiration. A properly stored bottle that passes the smell and taste test may be perfectly fine past that date. The reverse is also true: a poorly stored bottle can go rancid well before the date on the label.

    Signs That Sesame Oil Has Gone Bad

    When to Throw It Out

    According to the FDA, rancid oils are not acutely toxic in small amounts, but they have lost their nutritional value and produce compounds that may contribute to oxidative stress in the body. More practically: rancid sesame oil will ruin your food.

    Smell: This is your most reliable test. Fresh plain sesame oil has a mild, subtle nutty scent. Fresh toasted sesame oil smells deeply nutty, rich, and aromatic. Rancid sesame oil smells like paint thinner, nail polish remover, old crayons, or stale popcorn. That shift is unmistakable once you know it.

    Taste: Rancid oil tastes bitter, sharp, or soapy. For toasted sesame oil used as a finishing oil, even slight rancidity will be immediately obvious and unpleasant. A tiny taste on a clean spoon is your final confirmation if the smell test left any doubt.

    Color: Plain sesame oil should be pale yellow to golden. Toasted sesame oil ranges from amber to dark brown. If plain oil has significantly darkened, or if either type appears murky or cloudy at room temperature (not cold), that is worth investigating further with the smell test.

    What is NOT a sign of spoilage: If you refrigerate sesame oil, it may become cloudy or slightly thicker. This is completely normal. The cloudiness is caused by natural waxes solidifying in the cold and it does not affect flavor or quality in any way. Simply bring the oil to room temperature before using and it will return to its normal color and consistency.

    Why Sesame Oil Goes Rancid Faster Than Other Oils

    Sesame oil is primarily composed of unsaturated fats, roughly 40% monounsaturated fatty acids (MUFAs) and 44% polyunsaturated fatty acids (PUFAs), according to a review of sesame seed oil composition published by the National Institutes of Health. Polyunsaturated fats are significantly more reactive than the saturated fats found in highly stable oils like coconut oil. This makes sesame oil inherently more vulnerable to oxidation from air, heat, and light exposure.

    Toasted sesame oil has an additional vulnerability: the roasting process that creates its signature flavor also breaks down some of the natural antioxidants in the oil that would otherwise slow rancidification. The result is a more flavorful but less stable product.

    This is why storage conditions matter so much more for sesame oil than for, say, olive oil or coconut oil.

    How to Store Sesame Oil Properly

    Storage Best Practices

    Refrigerate toasted sesame oil after opening. This is the single most impactful thing you can do to extend its shelf life. The cold temperature significantly slows oxidation and preserves the vibrant nutty flavor that makes it worth buying.

    Store plain sesame oil in a cool, dark pantry. A kitchen cabinet away from the stove and out of direct sunlight is ideal. If your kitchen runs warm or you do not use it frequently, refrigerating plain sesame oil is a smart choice too.

    Keep the bottle tightly sealed. Oxygen is the primary driver of rancidity. Always close the cap firmly immediately after use. Wipe the rim clean before sealing to prevent residue buildup, which can introduce contaminants.

    Keep it away from heat and light. Never store sesame oil next to the stove or on a counter in direct sunlight. Both accelerate oxidation dramatically.

    Buy smaller bottles. This is one of the most practical tips for toasted sesame oil specifically. Because it is used in small amounts as a finishing oil, a large bottle can sit open for a year or more. A smaller bottle that you finish in a few months will always taste better than a large one that slowly degrades. Fresh oil is worth the slightly higher per-ounce cost.

    Never mix old oil with new. Pouring a new bottle into an old one speeds up the degradation of the fresh oil. Always start with a clean container.

    Can You Use Sesame Oil Past Its Best By Date?

    Often yes, for an unopened bottle. As the FDA notes, “best by” dates on shelf-stable products like oils are quality indicators set by the manufacturer, not federally mandated safety cutoffs. A properly stored, unopened bottle may remain perfectly good past the printed date.

    For an opened bottle, the date on the label becomes largely irrelevant. What matters is when you opened it and how you have been storing it. Use the shelf life estimates in the table above as your guide, and always check the smell and taste before using.

    Sesame Oil Recipes Worth Trying

    If your sesame oil is fresh and you are looking for ways to use it, these Better Living recipes are great starting points:

    Frequently Asked Questions

    My sesame oil is cloudy after I took it out of the fridge. Is it still good?

    Yes, absolutely. Cloudiness in refrigerated sesame oil is caused by natural waxes in the oil solidifying at cold temperatures. It has no effect on flavor or quality. Simply leave the bottle at room temperature for 15 to 20 minutes and it will return to its normal clear or amber appearance. This cloudiness is one of the most frequently misunderstood signs, and it is not spoilage.

    Can I cook with rancid sesame oil?

    No. Beyond the unpleasant flavor it will add to your food, rancid oil contains aldehydes and other oxidation byproducts that are not good for your body. If your sesame oil smells or tastes off, discard it and replace it. The small cost of a new bottle is worth far more than ruining a dish or consuming degraded oil regularly.

    Can I use sesame oil for skin or hair if it is slightly past its best by date?

    Apply the same sniff test you would for kitchen use. If the oil smells fine, it is likely still suitable for topical use. If it has gone rancid, do not apply it to your skin or hair. Rancid oil applied topically can clog pores, cause irritation, and will not deliver the nourishing properties you are looking for.

    Does the color of sesame oil change when it goes bad?

    Plain sesame oil may darken noticeably as it ages and approaches rancidity. Toasted sesame oil is already quite dark, so color change is a less reliable indicator for that variety. For toasted oil, the smell test is much more useful. Any oil that looks unusually murky or has visible sediment at room temperature is worth examining closely.

    Is sesame oil healthier than olive oil?

    Both are nutritious oils with different strengths. Sesame oil is rich in polyunsaturated fats and contains natural antioxidants including sesamol. Olive oil is higher in monounsaturated fats and has a more established body of research supporting cardiovascular benefits. They serve different culinary roles: sesame oil for flavor finishing in Asian cooking, olive oil for general cooking and dressings. Neither replaces the other.

    Further Reading

    The post Does Sesame Oil Go Bad? Everything You Need To Know appeared first on Better Living.

  • How to Reduce Allergy Symptoms This Pollen Season: 13 Proven Tips

    How to Reduce Allergy Symptoms This Pollen Season: 13 Proven Tips

    Can You Really Reduce Allergy Symptoms at Home?

    Yes. A combination of better indoor air quality, timed medications, and a few smart daily habits can significantly reduce how hard pollen season hits you. The key is acting before symptoms peak, not after.

    Fastest win: Start your allergy medication two to four weeks before your season begins, and shower at night instead of in the morning to keep pollen off your pillow.

    Medical Disclaimer: This article is for informational purposes only and is not medical advice. Always consult your healthcare provider before making changes to your medication routine, especially if you take medications or have existing health conditions.

    Achoo! If your eyes are watering, your nose will not stop running, and the word “outside” fills you with dread, you are not imagining it. Allergy season is genuinely getting worse. According to the Asthma and Allergy Foundation of America (AAFA), longer and more intense pollen seasons caused by the impact of climate change mean allergy symptoms hit harder and last longer each year. Some parts of the United States now experience pollen year-round.

    The good news is that there is a lot you can do about it. Whether you want to build a pollen fortress out of your home, time your medications correctly, or finally understand why March through October now feels like one endless sneeze, this guide covers everything. Jay Ayers, Indoor Air Quality Product Manager at Trane Heating and Cooling, contributed the foundational home air quality tips in this guide, and we have updated the post with the latest guidance from allergists, researchers, and public health authorities.

    Key Takeaways at a Glance

    Tip Why It Helps Difficulty
    Start meds early Preventive use blocks histamine before it fires Easy
    Keep windows closed Stops pollen from entering your breathing space Easy
    Upgrade air filtration HEPA removes up to 99.97% of airborne particles Moderate
    Change clothes at door Pollen clings to fabric and transfers to furniture Easy
    Shower before bed Washes daily pollen off hair and skin before it hits your pillow Easy
    Saline nasal rinse Physically flushes pollen from nasal passages Easy
    Wash bedding weekly Removes settled pollen and kills dust mites at 130°F Easy
    Use a dryer Line-drying coats clean laundry in fresh pollen Easy
    Allergen bedding covers Creates a physical barrier around mattress and pillows Moderate
    Dust and vacuum often Removes settled pollen before it recirculates Moderate
    Trim the lawn Shorter grass holds less airborne pollen Moderate
    Check pollen counts Helps you plan outdoor time around low-count windows Easy
    Consider immunotherapy The only treatment that changes the underlying immune response Long-term

    Why Allergy Season Keeps Getting Worse

    Before getting into the tips, it helps to understand what you are up against. A 2021 study found that human-caused warming is a primary driver of North American pollen seasons lengthening by an average of 20 days from 1990 to 2018, according to analysis by Climate Central. Warmer temperatures give plants more time to grow and release pollen, pushing the season earlier in spring and later into fall.

    The AAFA 2026 Allergy Capitals report confirms that increased moisture from extreme weather events directly impacts pollen seasons the following year. Well-watered trees produce significantly more pollen, and grasses grow denser and taller after wet winters and springs, releasing larger amounts earlier than the year before.

    Rising carbon dioxide levels also matter. Higher atmospheric CO2 causes some plants, particularly grasses and ragweed, to produce more pollen and more allergenic pollen. The result is that even people who never had allergies before are starting to develop them as adults. This is also why the spring health tips that worked a decade ago may not feel like enough anymore.

    Know Your Pollen Calendar

    Not all pollen is the same, and understanding which type is peaking when can help you time your precautions. Tree, grass, and weed pollen each have their own windows, and with climate change shifting those windows earlier and later, it pays to stay informed.

    Pollen Type Peak Season Common Sources Primary Symptoms
    Tree Pollen Feb through May Oak, birch, maple, cedar, pine Sneezing, congestion, itchy eyes
    Grass Pollen May through July Timothy, Bermuda, Kentucky bluegrass, ryegrass Runny nose, watery eyes, skin irritation
    Weed Pollen Aug through first frost Ragweed, pigweed, sagebrush, nettle Severe nasal symptoms, asthma triggers

    Pollen release typically peaks between 5 and 10 a.m. and again in the late afternoon. Check a real-time tracker like pollen.com before heading out on high-count days.

    13 Ways to Reduce Allergy Symptoms This Pollen Season

    1

    Start Your Medications Before Symptoms Begin

    This is the single biggest mistake allergy sufferers make: waiting until they feel miserable before reaching for antihistamines. The AAFA recommends starting allergy medications a couple of weeks before your season begins for the best results. Preventive use lets the medication build up in your system so it can block the histamine response before it fires, rather than trying to catch up once you are already symptomatic.

    As for which medication to choose, allergists note that 24-hour antihistamines are generally more effective than other forms, but those who experience side effects like drowsiness may do better with antihistamine or steroid nasal sprays. Talking to your doctor or pharmacist about the right fit for your symptom profile is always worth it.

    2

    Keep Doors and Windows Closed During Peak Pollen Hours

    We know. After a long winter, opening the windows feels like the most natural thing in the world. But letting in fresh air also means inviting in the pollen that travels with it, and pollen counts are at their highest in the morning. Use air conditioning on a recirculating or closed-loop setting to keep indoor air comfortable without pulling outdoor air into your living space.

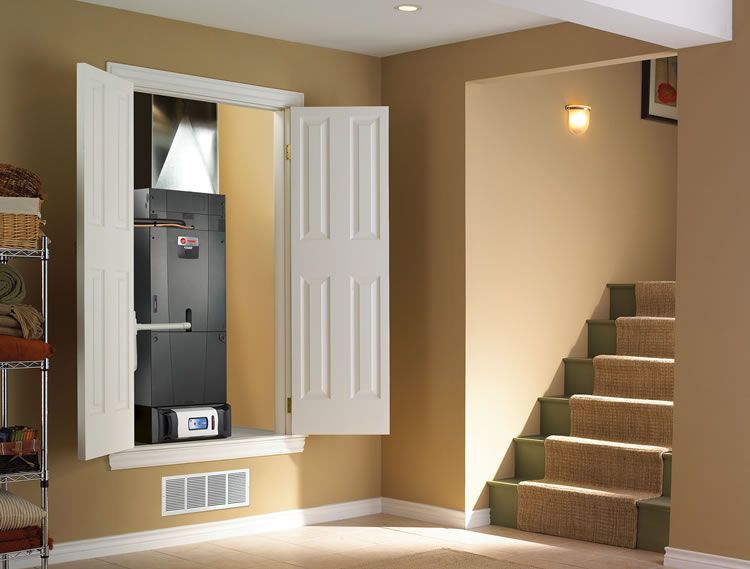
    For whole-home air filtration, the Trane CleanEffects Whole-Home Air Filtration System uses patented technology to remove up to 99.98 percent of airborne particles from the air circulated through your home, including pollen, dust, pet dander, bacteria, and tobacco smoke. It integrates directly into your HVAC system, meaning it works around the clock without requiring you to remember to run it.

    Trane CleanEffects whole-home air filtration system installed alongside a home HVAC unit to reduce allergy symptoms indoorsTrane CleanEffects whole-home air filtration system installed alongside a home HVAC unit to reduce allergy symptoms indoors

    The Trane CleanEffects Whole-Home Air Filtration System removes up to 99.98% of airborne allergens including pollen, dust, and pet dander. Photo courtesy of Trane Heating and Cooling.

    3

    Upgrade Your Indoor Air Filtration

    Whether you go with a whole-home system or a portable room unit, the filter matters. The American College of Allergy, Asthma and Immunology (ACAAI) confirms that the EPA has found HEPA filters can remove up to 99.97 percent of dust, pollen, and airborne particles 0.3 microns and above, which covers all common allergens. For HVAC filters, look for a MERV rating of 11 to 13 and replace the filter every three months during peak pollen season.

    The ACAAI also cautions that some air purifiers, particularly those with ionizers or UV light, have no scientific backing for allergy relief and can actually worsen symptoms. Stick to true HEPA mechanical filtration and match the clean air delivery rate (CADR) to the size of the room. This pairs well with the guidance in our post on how to improve air quality in older homes.

    4

    Remove Clothes and Shoes the Moment You Come Inside

    Pollen clings to fabric. You carry it in on your jacket, your shoes, your hair, and your skin, and every time you sit on the couch or lie on the bed you transfer that load of allergens to surfaces where you will continue to be exposed long after you have come in from outdoors. Change into fresh clothes immediately when you get home, leave outdoor shoes at the door, and give pets a quick wipe-down with pet wipes before they settle in for the evening.

    5

    Shower Before Bed Instead of in the Morning

    Shifting your shower to the evening is one of the highest-value habit changes you can make during pollen season. Throughout the day, pollen accumulates on your skin, scalp, and hair. If you go to bed without rinsing off, you transfer all of that directly to your pillow and bedding, then breathe it in for eight hours. An evening shower removes the day’s pollen load and keeps your sleep environment cleaner. This is especially important for hair, which tends to trap fine pollen particles particularly well.

    6

    Rinse Your Nasal Passages With Saline

    Saline nasal irrigation is one of the most evidence-backed, medication-free tools in the allergy toolkit. The Cleveland Clinic notes that many people feel better after just one use, and studies have shown that people with allergies who use nasal irrigation have improved symptoms for up to three months. A neti pot or squeeze bottle irrigator pushes a saline solution through your nasal passages, physically flushing out pollen, mucus, and other irritants before they can trigger a prolonged immune response.

    Safety note: Always use distilled, sterile, or previously boiled and cooled water. Never use untreated tap water, as certain waterborne organisms can cause serious infection when introduced directly into the nasal passages.
    7

    Wash Bedding Weekly on a Hot Cycle

    Pollen travels in the air and settles on every surface, including your sheets and pillowcases, even when you have not been lying in bed in your outdoor clothes. Washing bedding once a week removes the accumulated load. The water temperature matters: the wash cycle needs to reach at least 130 degrees Fahrenheit to kill dust mites and their eggs, which can amplify allergy symptoms even during pollen season when your immune system is already working overtime.

    8

    Use a Dryer Instead of an Outdoor Clothesline

    Line-drying clothes outdoors during pollen season is a classic way to undo all the good work of washing them. Fresh pollen from surrounding trees and grasses coats fabric as it hangs, and you bring it straight back into the house when you carry the laundry in. Use a dryer throughout peak pollen weeks and save the clothesline for lower-count days in late fall or early winter.

    9

    Use Certified Hypoallergenic Bedding Covers

    Allergen-barrier covers for mattresses and pillows create a physical seal between you and the dust mites and pollen particles that accumulate inside bedding over time. When shopping for covers, look for products that fully encase the mattress and pillows rather than just covering the top surface. A full encasement ensures that nothing gets in or out regardless of how you sleep. Pair these with your weekly washing routine for maximum effect.

    10

    Dust and Vacuum Frequently

    Pollen that enters the home through open doors, on clothing, or on pets settles as dust on floors, furniture, and window sills. Dusting and vacuuming several times a week keeps this settled load low. Use a vacuum cleaner with a HEPA filter so that allergens captured from the floor are not re-released into the breathing zone during the vacuuming process. For hard floors, damp mopping is more effective than dry sweeping, which can stir fine particles back into the air.

    11

    Keep Your Lawn and Garden Trimmed

    Longer grass blades catch and hold more airborne pollen from surrounding trees and flowers, creating a reservoir of allergens right outside your door. Keeping the lawn trimmed throughout spring and summer reduces this effect. If you are the one doing the mowing, wear a mask and sunglasses and change clothes immediately afterward. On high-pollen days, consider delegating yard work to a household member without allergies, or hiring help for the worst weeks of the season. For more on low-effort yard upkeep, see our guide on easy ways to improve the appearance of your yard.

    12

    Check Pollen Counts Daily and Plan Accordingly

    Free pollen tracking tools like pollen.com and the weather apps on most smartphones now show real-time pollen forecasts broken down by tree, grass, and weed categories. Pollen is typically at its highest between 5 and 10 in the morning and again in the late afternoon. On high-count days, schedule outdoor exercise for the late afternoon after a light rain, when pollen has been washed out of the air. Save early mornings for indoor workouts.

    13

    Consider Long-Term Immunotherapy

    If over-the-counter medications are not providing enough relief, it may be time to talk to an allergist about immunotherapy. Allergy shots (subcutaneous immunotherapy) have been prescribed for over 100 years and can address multiple allergens at once, including trees, grasses, weeds, mold, pet dander, and insect stings. The ACAAI notes that allergy shots are the only treatment that actually changes the immune system and prevents new allergies and asthma from developing.

    For those who prefer a needle-free option, sublingual immunotherapy (SLIT) tablets are FDA-approved for grass pollen, ragweed, and dust mites. The Cleveland Clinic notes that SLIT works by exposing your immune system to small amounts of allergen daily under the tongue until it stops seeing them as a threat. Treatment typically continues for three to five years, but benefits frequently persist well after it ends.

    Frequently Asked Questions

    When does pollen season start and end?

    In most of the United States, tree pollen begins in February or March and runs through May. Grass pollen peaks from May through July. Weed pollen, with ragweed being the most common trigger, runs from August through the first hard frost, which in many regions falls in October or November. Climate change is pushing these windows earlier and later, so symptoms that arrive in February or persist into November are increasingly common.

    What time of day is pollen lowest?

    Pollen counts are generally at their lowest in the late afternoon and early evening, particularly after rainfall. Counts are highest in the early morning between roughly 5 and 10 a.m. If you want to exercise outdoors, mid to late afternoon on a day following rain is your best window.

    Can indoor air be worse than outdoor air for allergy sufferers?

    Yes. The ACAAI notes that the EPA identifies indoor air pollution as one of the top five environmental health risks. Pollen enters the home on clothing, through open windows, and via pets, then settles into carpets, upholstered furniture, and bedding where it accumulates. Without proper air filtration, regular cleaning, and allergen covers on bedding, indoor air can recirculate allergens continuously. See also: new research linking indoor air quality to rising anxiety.

    How early should I start allergy medication?

    Most allergists recommend starting antihistamines or nasal steroid sprays two to four weeks before the pollen type you react to typically peaks in your area. If you usually suffer during tree pollen season in March, beginning a regimen in late February gives the medication time to work preventively rather than reactively.

    Are allergy shots worth it?

    For people with moderate to severe allergies that do not respond adequately to medication, immunotherapy has a strong evidence base. According to the Cleveland Clinic, you may need regular shots for up to five years, but they can provide a great amount of relief from severe allergies. It is the only current treatment that changes the underlying immune response rather than just managing symptoms.

    What can I do for allergies at night?

    Showering before bed, using allergen-encasing pillow and mattress covers, washing bedding weekly at 130°F, and keeping bedroom windows closed during peak pollen hours are the four highest-impact nighttime strategies. If you still struggle, a HEPA air purifier running in the bedroom overnight makes a meaningful difference. Our guides on sleeping better naturally and good sleep hygiene have additional tips that work alongside allergy management.

    The Bottom Line

    The AAFA 2026 Allergy Capitals report confirms that climate-driven changes in growing seasons are pushing pollen levels and allergen potency higher across the country year after year. The good news is that a combination of good indoor air quality, smart daily habits, and the right medications or long-term treatment can make a meaningful difference. Start with the tips that are easiest for you to implement right now, whether that is an evening shower routine, a saline rinse, or upgrading the filter on your HVAC system, and build from there.

    And if seasonal allergies are disrupting your sleep, work, and daily life, reach out to a board-certified allergist. With the testing and treatment options available today, suffering through every spring and fall is not the only choice.

    For more spring wellness reading, explore our guides on essential oils for spring allergies, spring health tips, and the science behind common allergies.

    Disclaimer: This article is for educational purposes only and is not intended to diagnose, treat, cure, or prevent any disease. The information provided is not a substitute for professional medical advice, diagnosis, or treatment.

    Always seek the advice of your physician or other qualified health provider with any questions you may have regarding a medical condition. Never disregard professional medical advice or delay in seeking it because of something you have read in this post.

    The post How to Reduce Allergy Symptoms This Pollen Season: 13 Proven Tips appeared first on Better Living.

  • Curtains!

    Curtains!

    Curtains are necessary for all the apartments.

    Usually hung around windows in the homes.

    Protecting us from the sun.

    They decorate the house too.

    There are many different colors and designs also.

    Such as printed and patterned ones.

    Giving a complete feeling on the lifestyle!